How to use jails on pfSense 2.4
Disclosure: I have no idea how this impact the security of pfSense. There is probably a good reason why the jail service is disabled by default. Hence, beware that this might cause unexpected security issues as it is not a supported package.
Many, many years ago, I used to be an avid user FreeBSD jails. They were a great way to isolate services and boost security in the pre-Docker world. While I can’t say I use FreeBSD much these days, I still run pfSense on more or less all my firewalls. It’s easy to use, secure, and perhaps most importantly, very stable.
Since pfSense is based on FreeBSD, its possible to run jails on it. I wouldn’t encourage using this to run business critical applications, but I use it to run some minor non-external, non-essential services.
In this tutorial, I will walk you through how to go from zero to jails on pfSense 2.4. We will also be using ezjail to simplify the management of the jails.
Create a dedicated IP for the jail
The first thing we need to do is to create a dedicated virtual IP for each jail. This is fairly straight forward in pfSense. Go to Firewall -> Virtual IPs and press ‘Add.’
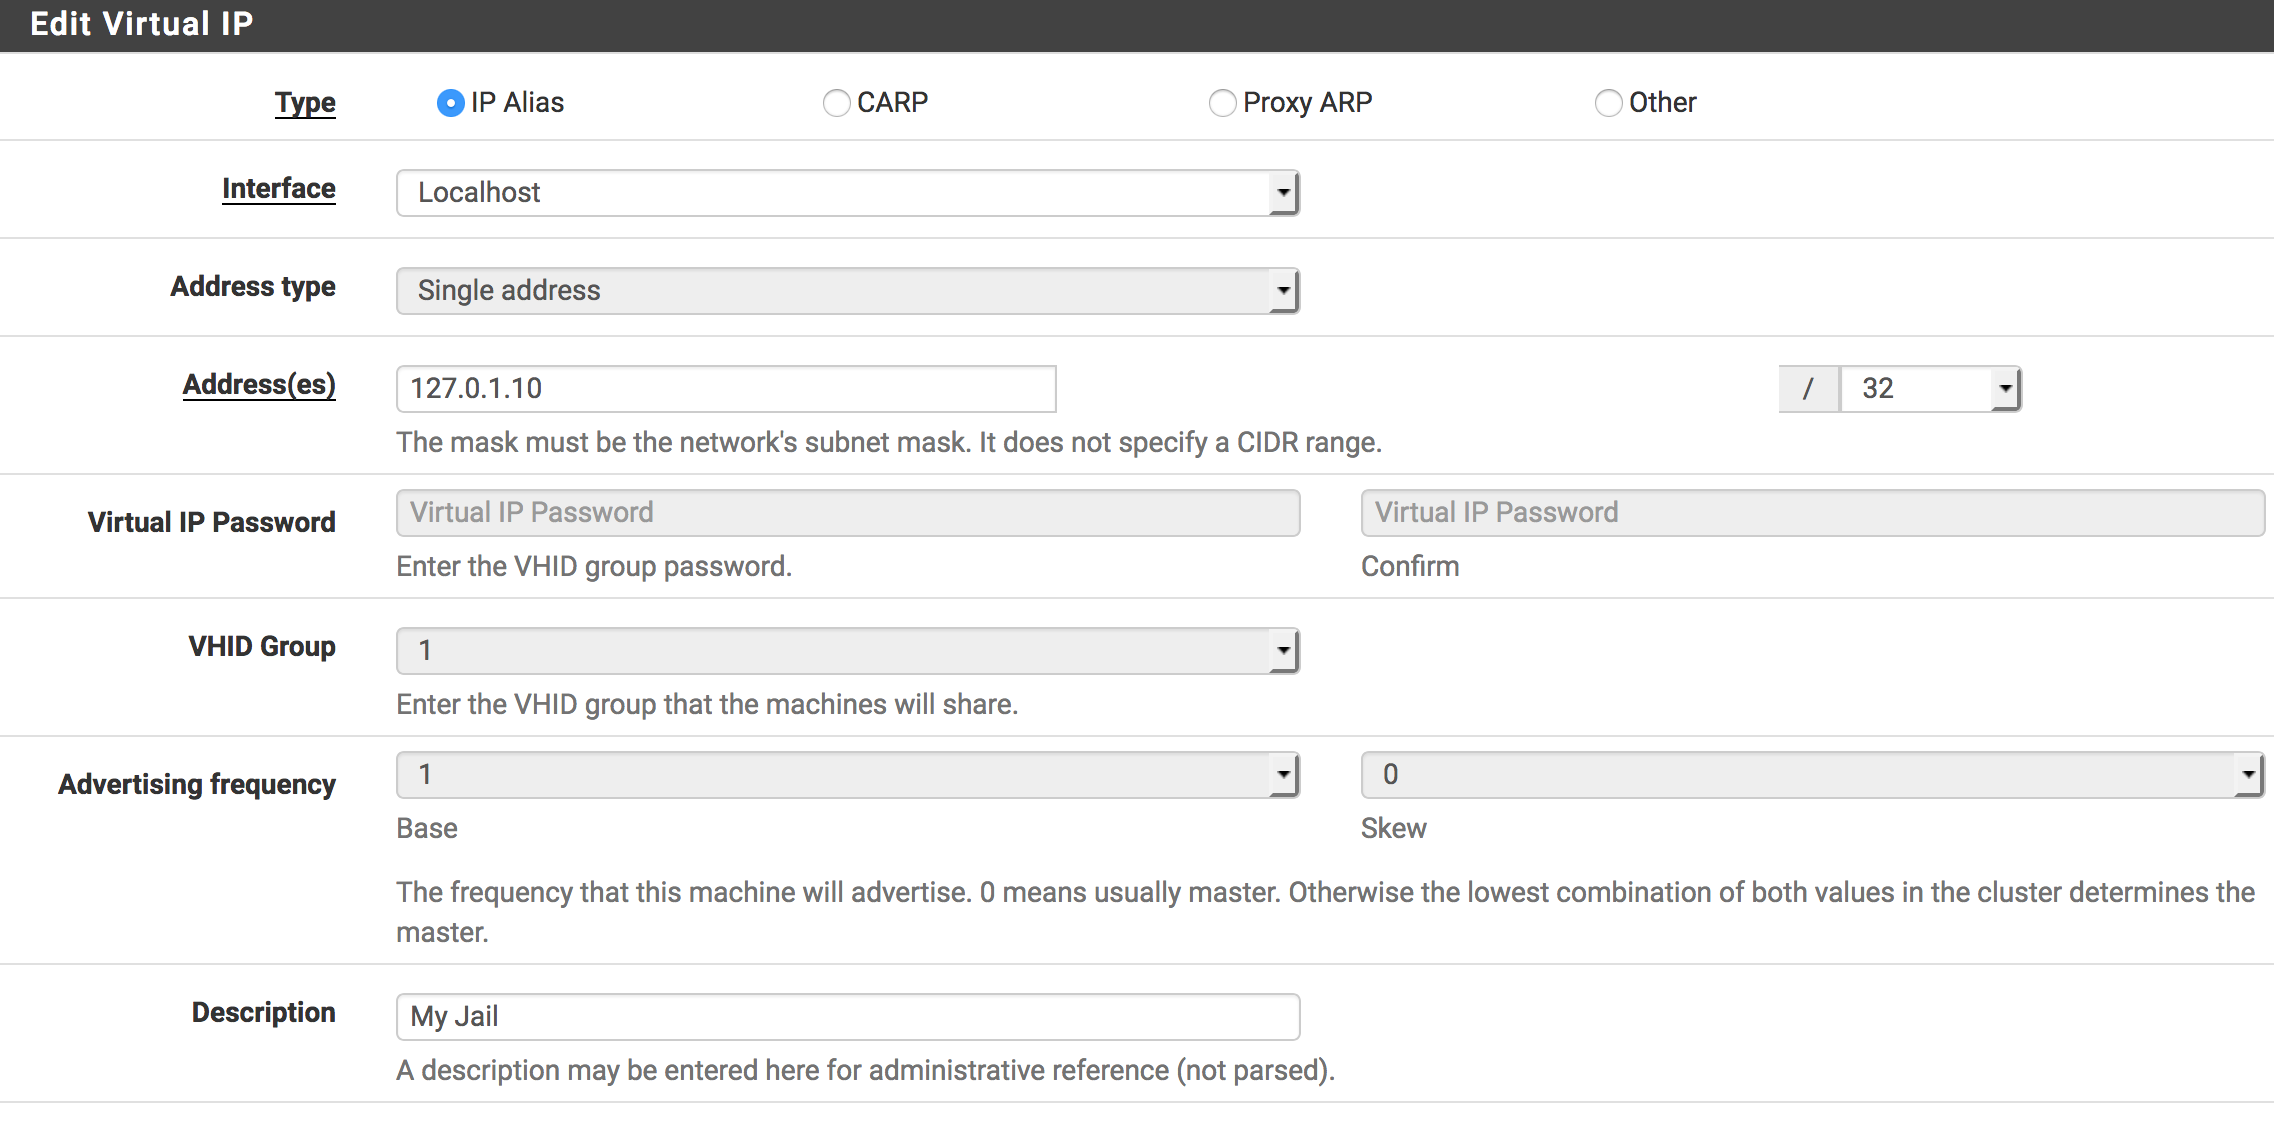
I would suggest that you only use the localhost interface, as I’m not sure what the security implications would be if you’re exposing it to a WAN/LAN interface. I would also discourage from exposing any services in the jail. The reason for this is that if the service somehow gets compromised, the attacker would have free flow to all your network interfaces. It might be possible to mitigate this with firewall rules, but consider yourself warned.
Prepare the system
With the virtual IP(s) created, it’s now time to prepare the server. Start by SSH’ing into the box and run the following commands.
Install ezjail package:
$ pkg add http://pkg.freebsd.org/freebsd:11:x86:64/latest/All/ezjail-3.4.2.txz
Brute force link to make jails to work:
$ ln -s /lib/libkvm.so.7 /lib/libkvm.so.6
Download missing jail file:
$ curl -o /etc/rc.d/jail https://raw.githubusercontent.com/freebsd/freebsd/stable/11/etc/rc.d/jail
$ chmod +x /etc/rc.d/jail
Enable and initiate ezjail:
$ echo 'ezjail_enable="YES"' | tee -a /etc/rc.conf.local
$ ezjail-admin install
Create a jail
Next up, let’s create a jail called ‘labjail.local’ with the IP 127.0.1.10:
$ ezjail-admin create labjail.local 'lo0|127.0.1.10'
We also need to fix a bug in the configuration for it to work:
$ sed -I \
    -e 's/procfs_enable=\"YES\"/procfs_enable=\"NO\"/g' \
    /usr/local/etc/ezjail/labjail_local
We can now start the jail by running:
$ ezjail start labjail.local
We can also verify the result by running:
$ ezjail list
STA JID  IP              Hostname                       Root Directory
--- ---- --------------- ------------------------------ ------------------------
DR  1    127.0.1.10      labjail.local                  /usr/jails/labjail.local
Accessing the jail
Once the jail is up and running, you can access it by running:
$ ezjail console labjail.local
Summary
You should now have your jail(s) up and running. They will however not auto-start when you reboot your pfSense server. You can read more about how to use and configure ezjail here.
Happy hacking!