Home Assistant, ESPHome and JZK ESP-32S
Long story short, I’ve pimped out my apartment with a lot of Ikea Smart products, such that I can control (and automate) everything from Home Assistant. While I admittedly have a love-hate relationship with Home Assistant, it is generally speaking a pretty impressive software.
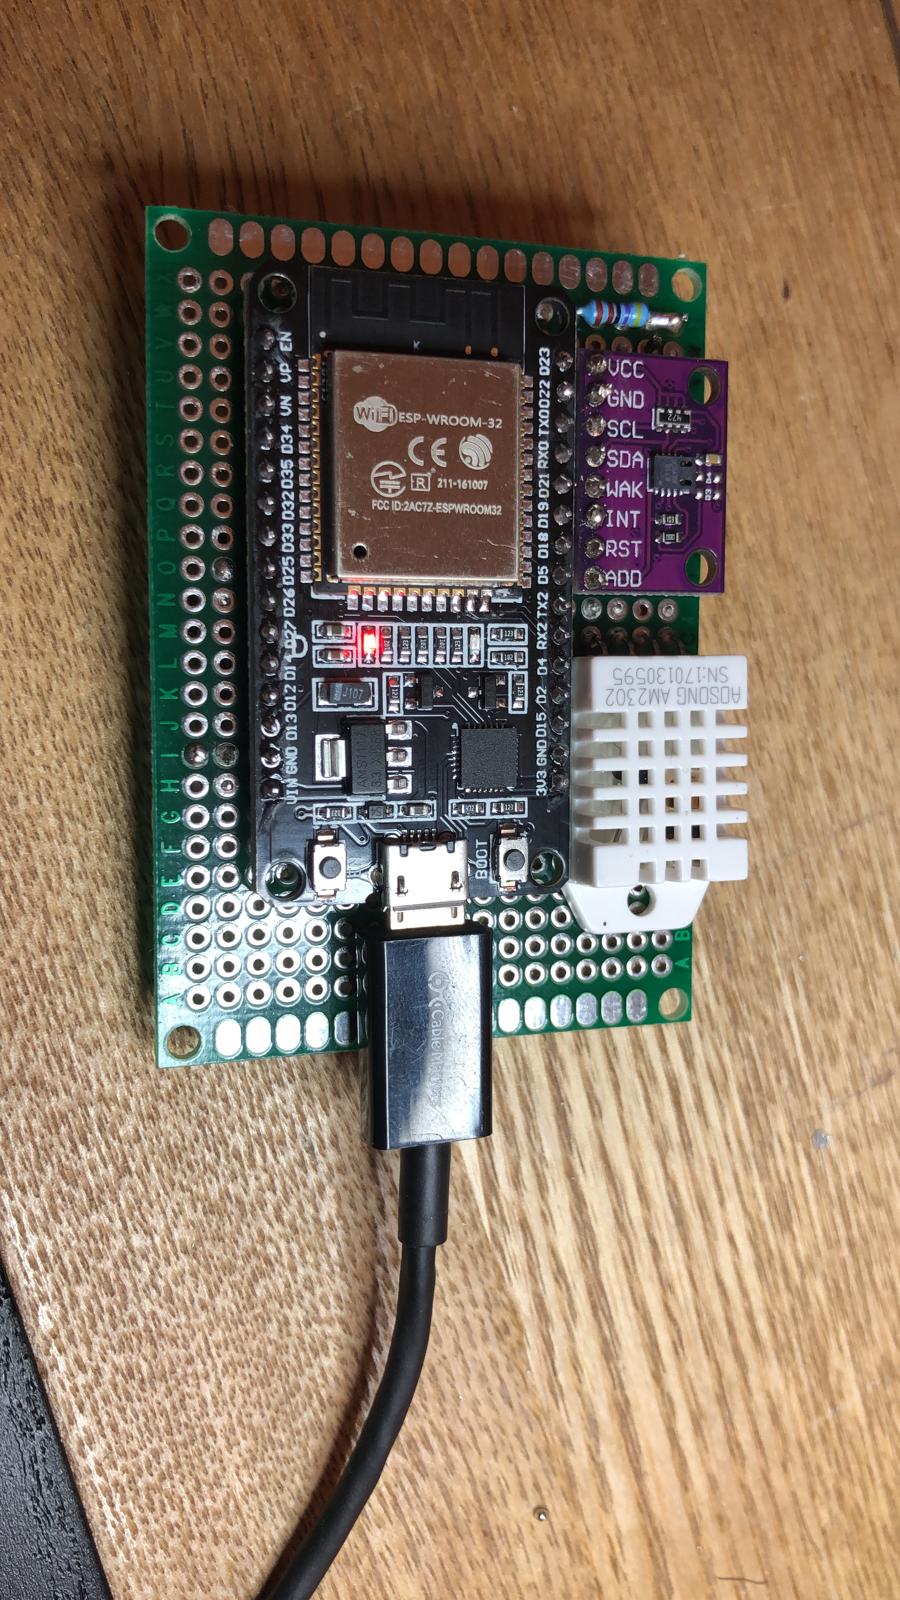
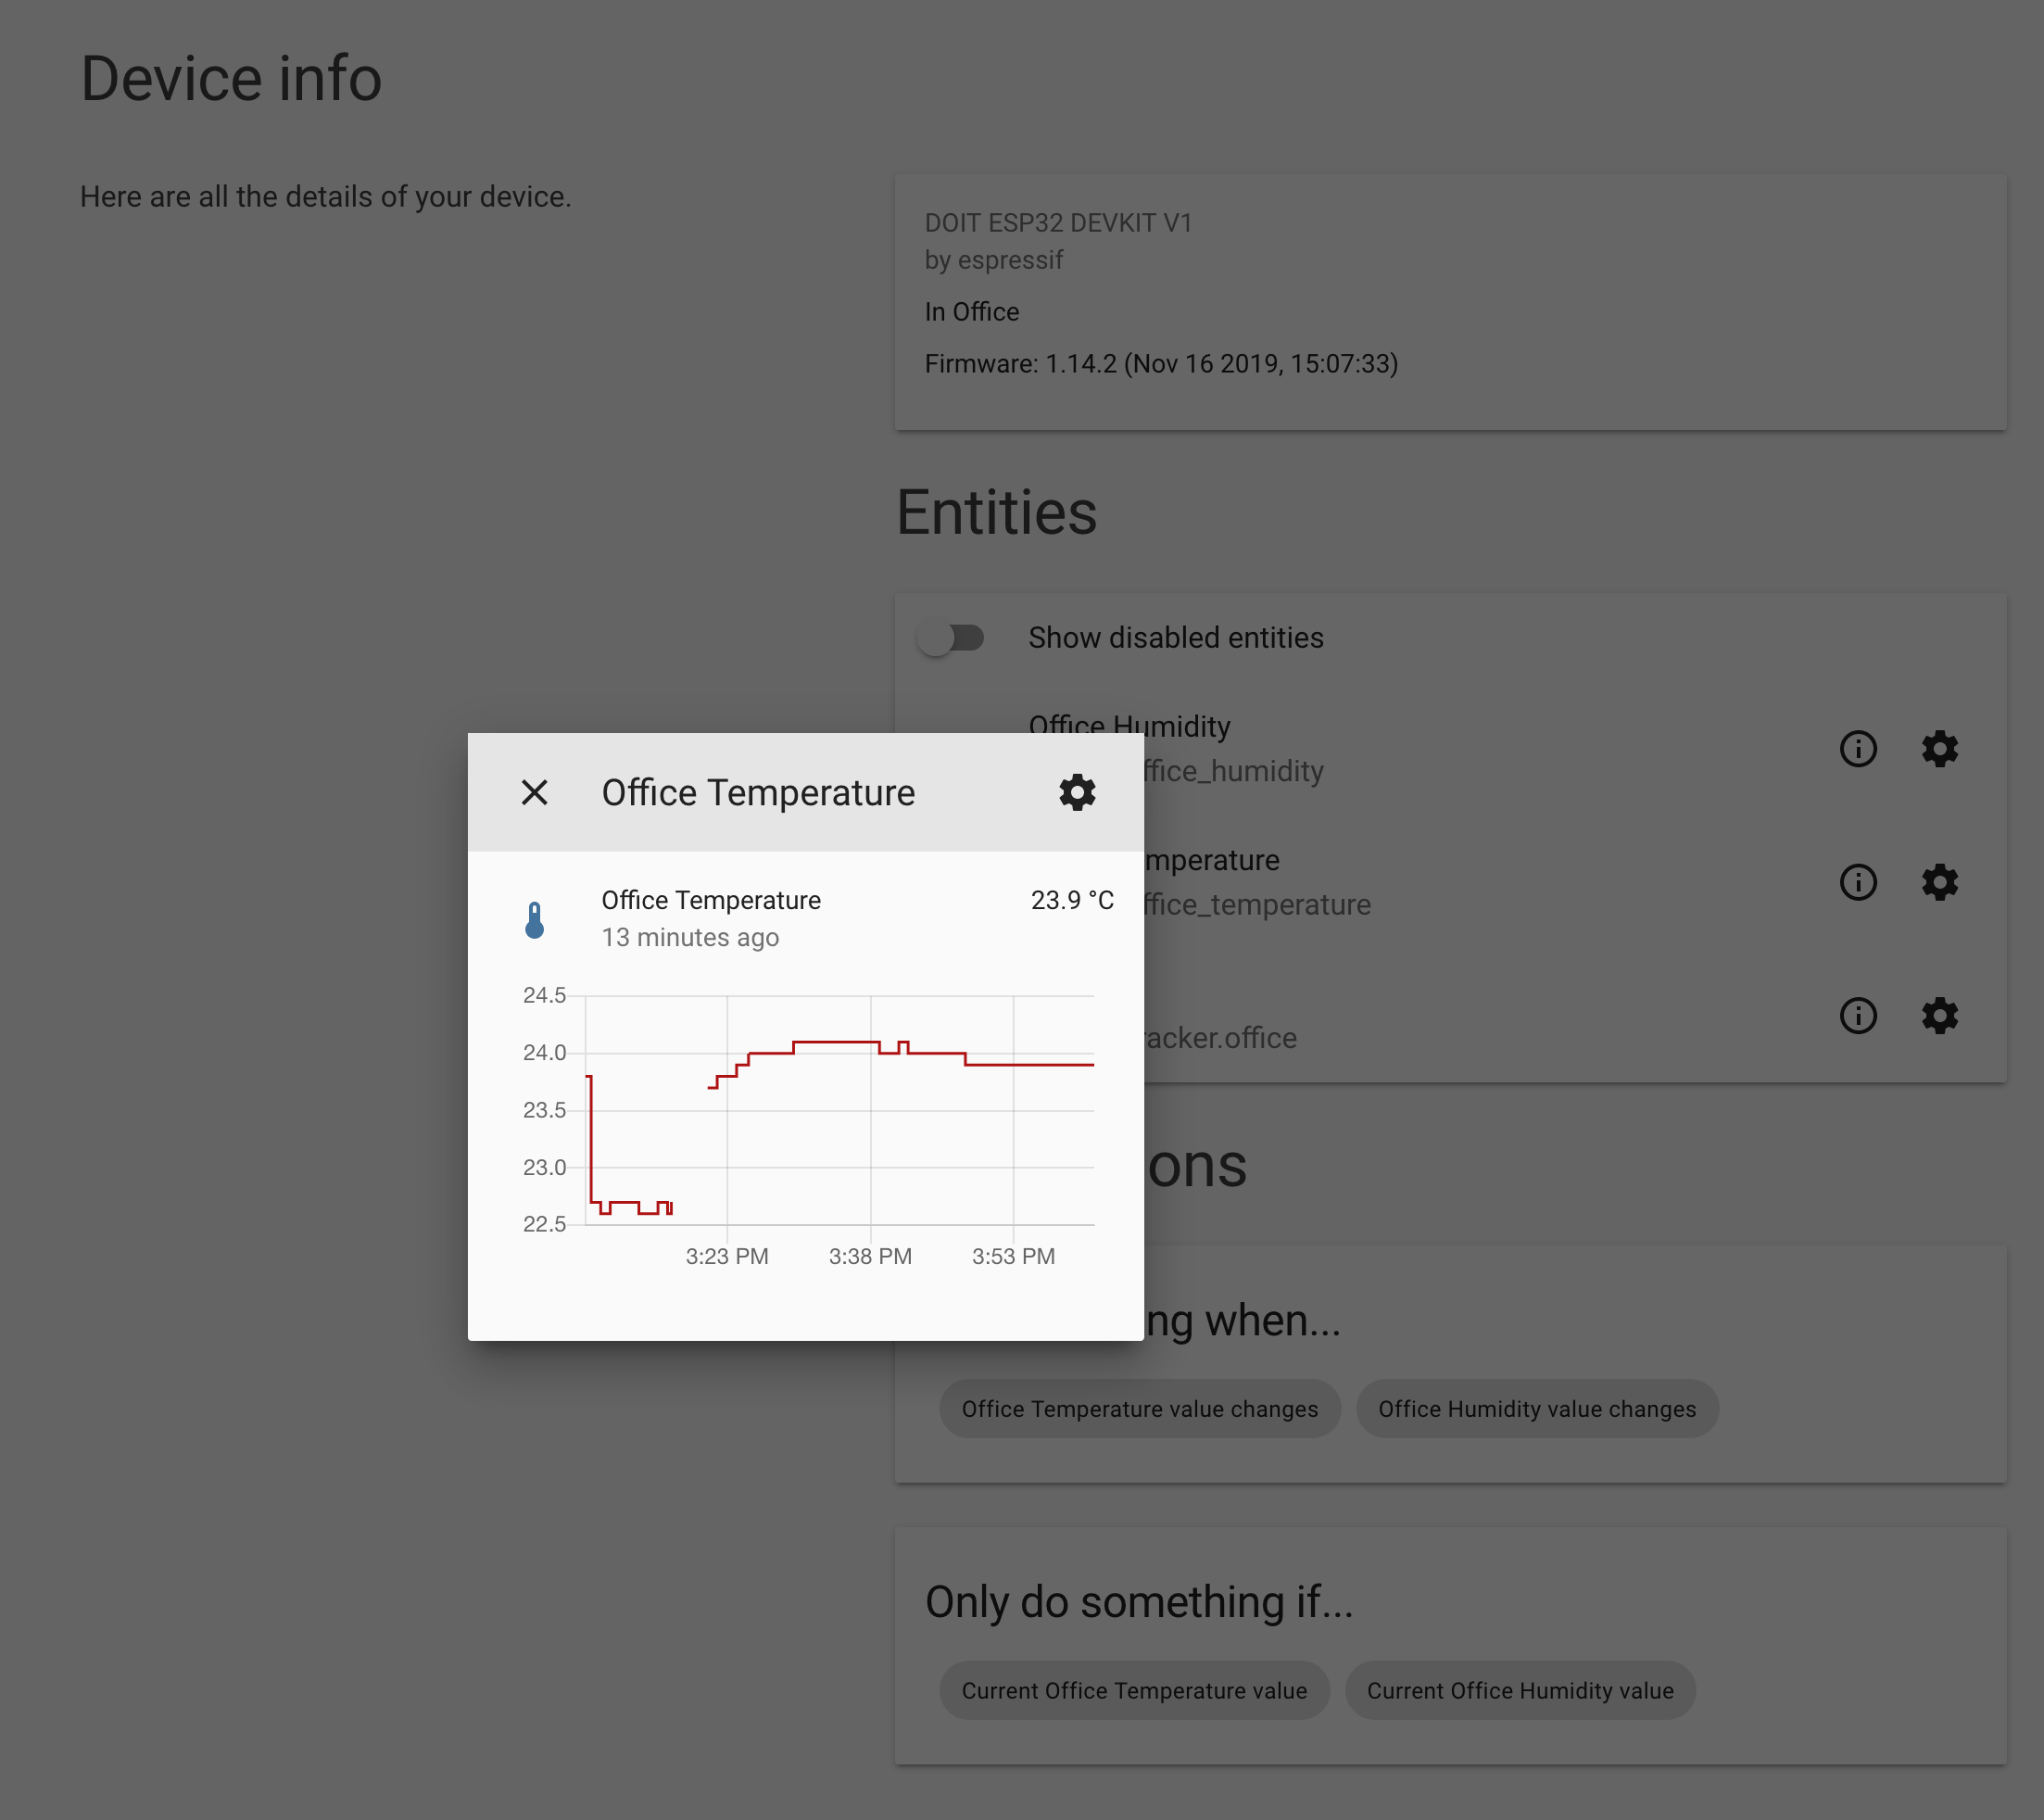
One thing I’ve been meaning to do for some time is to log the temperature in various rooms. Since I didn’t want to put a Raspberry Pi in every room, I opted for an ESP32 with a DH22 sensor. While I initially planned to write a simple web server or MQTT client to export the data, I was lucky to run across ESPHome, which does all of this out of the box. Moreover, it also integrates seamlessly with Home Assistant.
As someone who haven’t spent a ton of time with embedded hardware, it took me a little while to get this all working. Most of the time however was spent trying to get my JZK ESP-32S ESP32 to properly read the sensor. Due to very poor documentation for the board, I wasted a lot of time. However, after finding these schematics I was able to get it to work on D25.
For those who bought the JZK ESP-32S ESP32, here is the configuration that I ended up for in ESPHome:
esphome:
  name: office
  platform: ESP32
  board: esp32doit-devkit-v1

wifi:
  ssid: "not-my"
  password: "wifi-confi"

  # Enable fallback hotspot (captive portal) in case wifi connection fails
  ap:
    ssid: "Office Fallback Hotspot"
    password: "xxxx"

captive_portal:

# Enable logging
logger:

sensor:
  - platform: dht
    pin: 25
    model: DHT22
    temperature:
      name: "Office Temperature"
    humidity:
      name: "Office Humidity"
    update_interval: 60s

# Enable Home Assistant API
api:

ota:
Other pro-tip for people new to Home Assistant:
- Don’t use a Raspberry Pi if you’re doing something beyond very basic. Instead use a virtual machine or similar.
- Switch to using MySQL instead of the default Sqlite3 database as the backend as it will significantly improve performance.
- Bonus: Adopt InfluxDB, which you can then consume from Grafana for better visualization.
Update 1: Air quality monitor
Since starting working this, I’ve modified the board to also include an air quality sensor (CJMCU-811). I’ve also gone ahead and published the schematics.
The next step is to solder this together on a smaller breadboard to reduce the footprint.
Update 2: Transferred to a proper board
Today I finally received my breadboard and transferred the components. Looking pretty sleek.